Micro mycology. Mushroom cultivation for nomads and minimalists.

Mushrooms are cool, but what to do if I live in a van?
I'm excited to share a practical guide for those of you who, like me, live a nomadic or minimalist lifestyle but still want to explore home mushrooms cultivation. We'll be focusing on growing, a strain of Psilocybe cubensis, using the Mini Monotub Method—a space-efficient, low-maintenance setup ideal for small flats, shared houses, or even vanlife setups.
What is the Mini Monotub (MM) Method?
The Mini Monotub Method is a compact version of traditional monotub and shoebox techniques—adapted for simplicity, mobility, and ease of use. It involves cultivating mushrooms in a small plastic container with a lid (roughly the size of a shoebox), using minimal intervention. It’s perfect for those with limited space or unpredictable routines.
Unlike large-scale setups, this method doesn't require constant fanning or misting. Once colonized, the tub largely maintains its own microclimate. The only exception might be during hot weather, when light misting and a bit of extra airflow—like opening the lid once a day—can help keep conditions optimal.
In this guide, I’ll walk you through every step of using this method to grow Psilocybe cubensis mushrooms from homegrown grain spawn. This post is intended for readers who already have some experience with grow kits or liquid cultures, and are ready to take their skills one step further into DIY cultivation. If you’re completely new to mycology, I recommend starting with this beautiful beginner’s book that covers cloning, agar work, and preparing grain spawn. I’ll be releasing my own simplified guides on those steps soon—so stay tuned!
Materials You'll Need
To begin your mini monotub grow, gather the following:
- 1x 30L cooler (a simple lidded bucket can also work for pasteurizing substrate)
- 2x 15L plastic tote boxes with lids (shoebox-sized; you can adjust slightly but will need to balance substrate accordingly)
- 2x 30L trash bags (I used one black and one yellow for experimentation, but any color works fine)
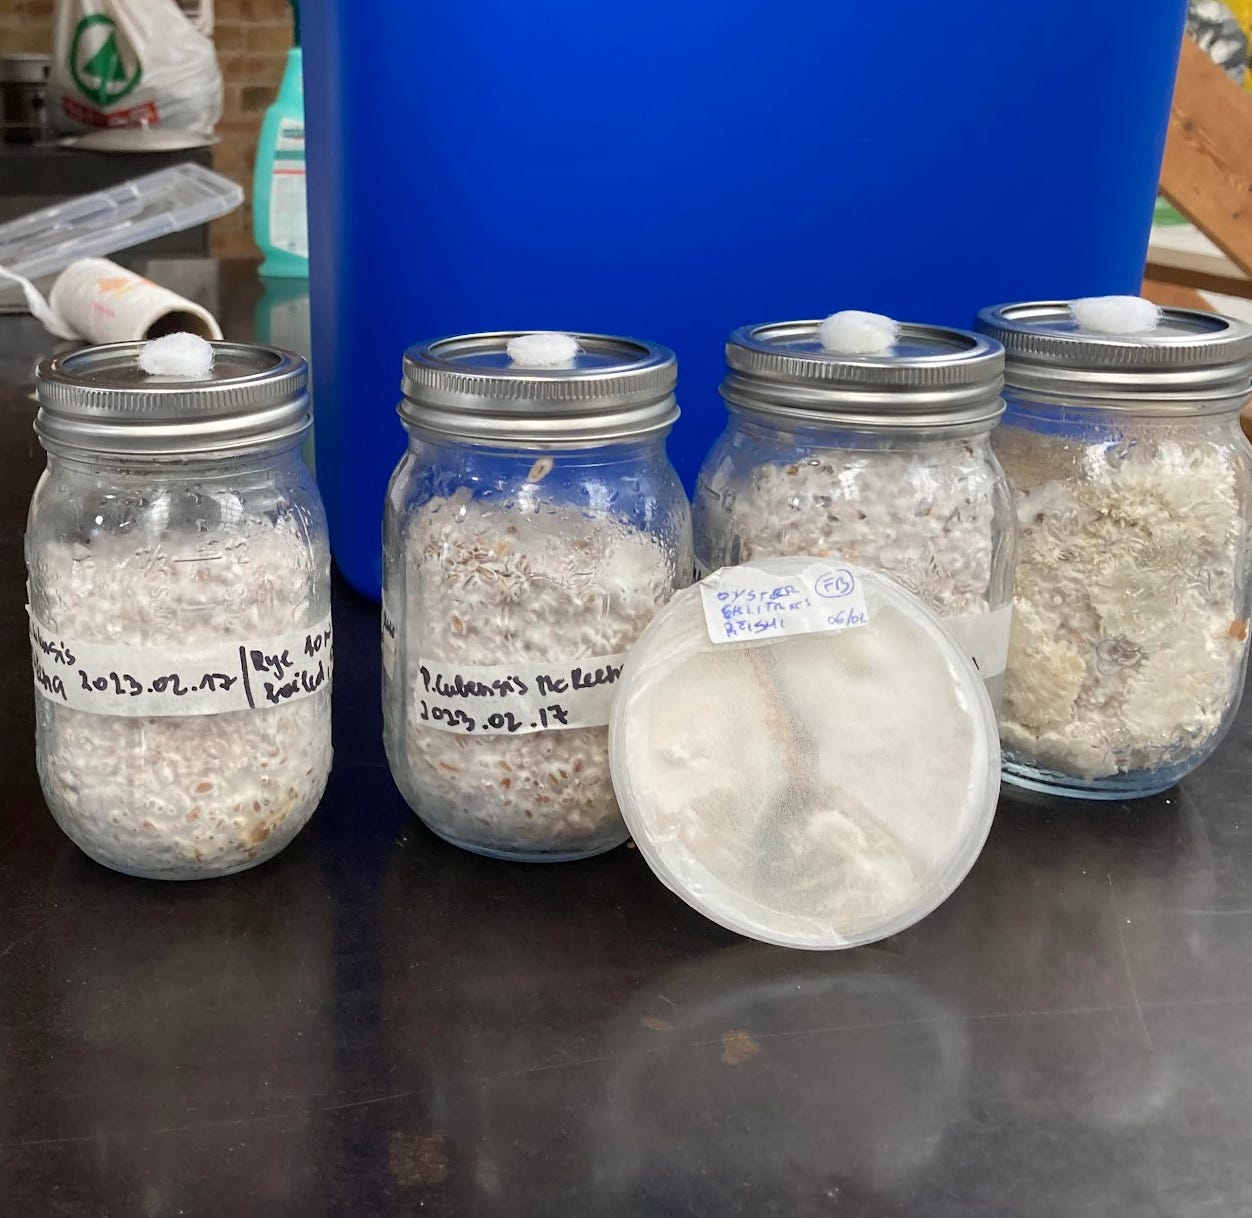
- 3x 250ml jars of homegrown mushroom spawn (I used McKennaii Psilocybe cubensis strain)
- ½ block of coco coir (coconut fiber; available at gardening stores)
- 6 tablespoons of gypsum (calcium sulfate, commonly found as powder in construction stores)
- 8 cups of vermiculite
- 16 cups of boiling water
- Sanitol or 70%+ alcohol for cleaning and sterilization
Process
Step 1: Substrate preparation
The substrate, a blend of Coco coir, Vermiculite, and Gypsum, is then prepared in a 30l cooler and sterilized using boiling water - this step is crucial in ensuring a clean, contaminant-free environment for the mycelium to grow.
Commentary: I had a lot of difficulty breaking a coco coir block while it was dry, I highly recommend rehydrating all of it and leaving half of the block for the next time or use for plants repotting.
Step 2: Assembling the Monotub
Once the substrate has cooled down, it's time to mix it with the colonized rye grain spawn. This is done in two sanitized tote boxes, each lined with a different coloured trash bag - one black and one yellow. For the substrate mixing I choose to add all ingredients in the bag first, close it and shake it well, it helped to mix everything well and avoid unnecessary exposure time. After mixing, the tote bags were closed and stored in a dark environment, 20-26 degrees C’
Commentary:I'm looking for exploring more natural and biodegradable solutions in the future, but for now trash bag setup is proven as the most effective. I was observing if the colour of the bag influences yields, side pinning, or contamination. At the end of the experiment, I found out that the colour of the bag doesn’t significantly impact any of the mentioned factors, you can pick any colour you desire safely.

Step 3: Mycelium colonization and pinning
About two weeks after inoculation, you'll see the first flush of mushrooms appear. This indicates successful colonization and the beginning of our mushroom growth. From this moment forward, I started to spray water on the tote walls as well as give some oxygen by opening the box and giving some wind.
Commentary: Don’t forget to clean your hands with alcohol before opening the box in order to avoid contaminants.


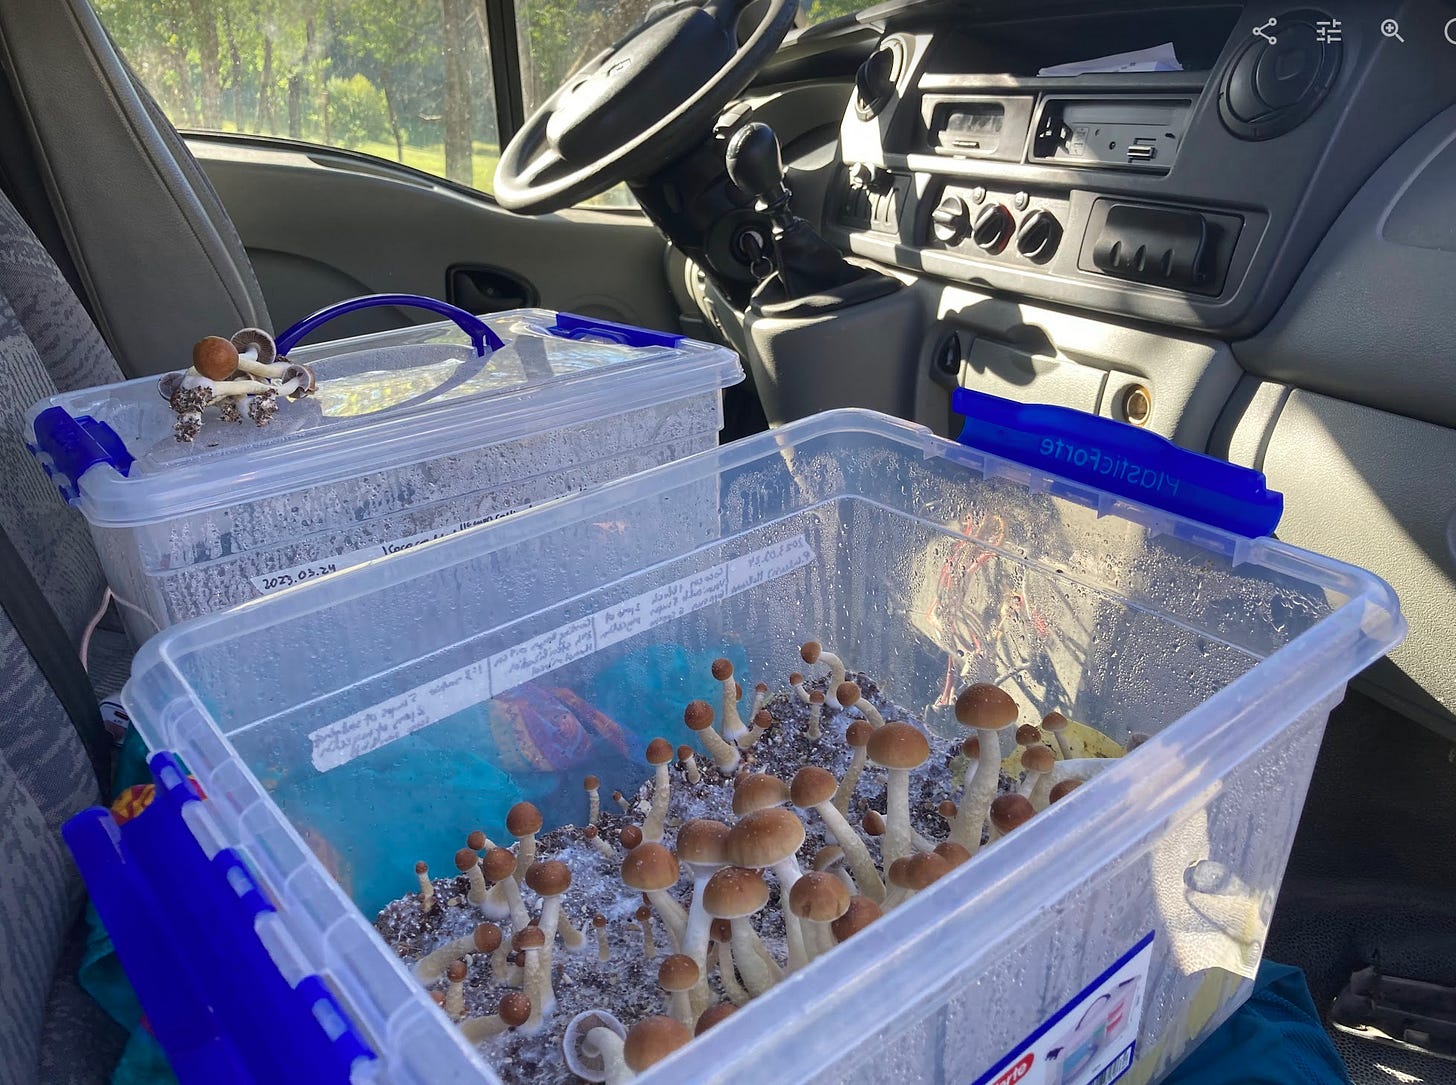
Step 4: Subsequent Flushes and Travel Adaptability
After the first flush, I cleaned the cake from mushrooms and shocked the cake ( mycelium substrate) with cold water for 4 hours. Repeated the process after consecutive flushes as well.
The second and third flushes happened on the road, inside my camper van! I had to travel, but that didn't mean the mushroom cultivation had to stop. The Mini Monotub Method is wonderfully adaptable, and the mushrooms continued to thrive even during travel. During the trip, I used fresh river water for the cake flushing and it worked great.

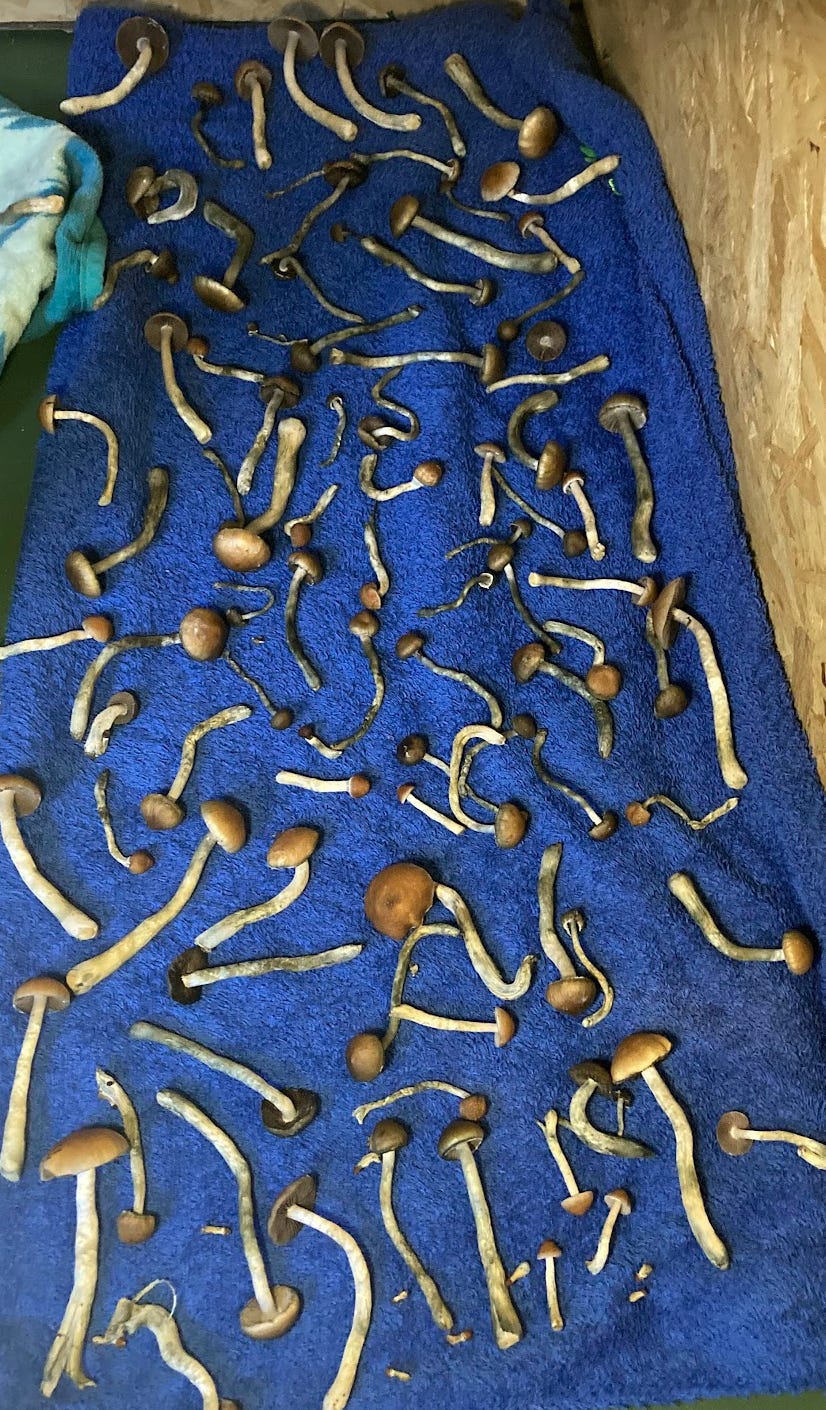
Step 5 Mushroom drying and preservation
After the third flush, our cultivation journey comes to an end. Across these three flushes, I harvested a total of 890 grams of mushrooms. After each flush I was drying them on my table in the van or the passenger seat while driving. Both of these methods could be improved in the future.
Commentary: While drying try to avoid direct sunlight, because hot temperatures and sun exposure break psilocybin and mushrooms could significantly lose their potency.
Final thoughts
In conclusion, cultivating mushrooms, especially the Psilocybe Cubensis, using the Mini Monotub Method is an accessible and rewarding hobby. It's adaptable and perfect for those with limited space. More importantly, it's a testament to the magic of mycology - accessible to all and bound only by your curiosity. So, go ahead, try it out, and feel free to share your experiences with me.
P.S. If you have any questions, need help setting up your own Mini Monotub, or want to share your own mycology adventures, feel free to reach out to me :)
All the love,
Justina xx
